Background
Although some authors have written recently that because the practice of embedding amber in casting resins is a fairly new technique, it is unclear what the long-term consequences may be (Bisulca etal. 2012, Penny and Jepson 2014). However, embedding amber pieces in casting resins is not new. Based on past examples, the practice is proving to be very beneficial, especially for collections with amber pieces deteriorating because of non-optimal storage conditions. Ideally, amber should be kept in anoxic conditions (no oxygen), non-fluctuating humidity levels (neither high nor low humidity is good), kept in light-tight containers, and away from high temperatures. Exposure to these elements can cause the amber pieces to darken, makes the amber more brittle causing the surfaces to craze (covered by a network of minute, hairline fractures) Unfortunately, mitigating all of these environmental conditions is a major challenge for museums.
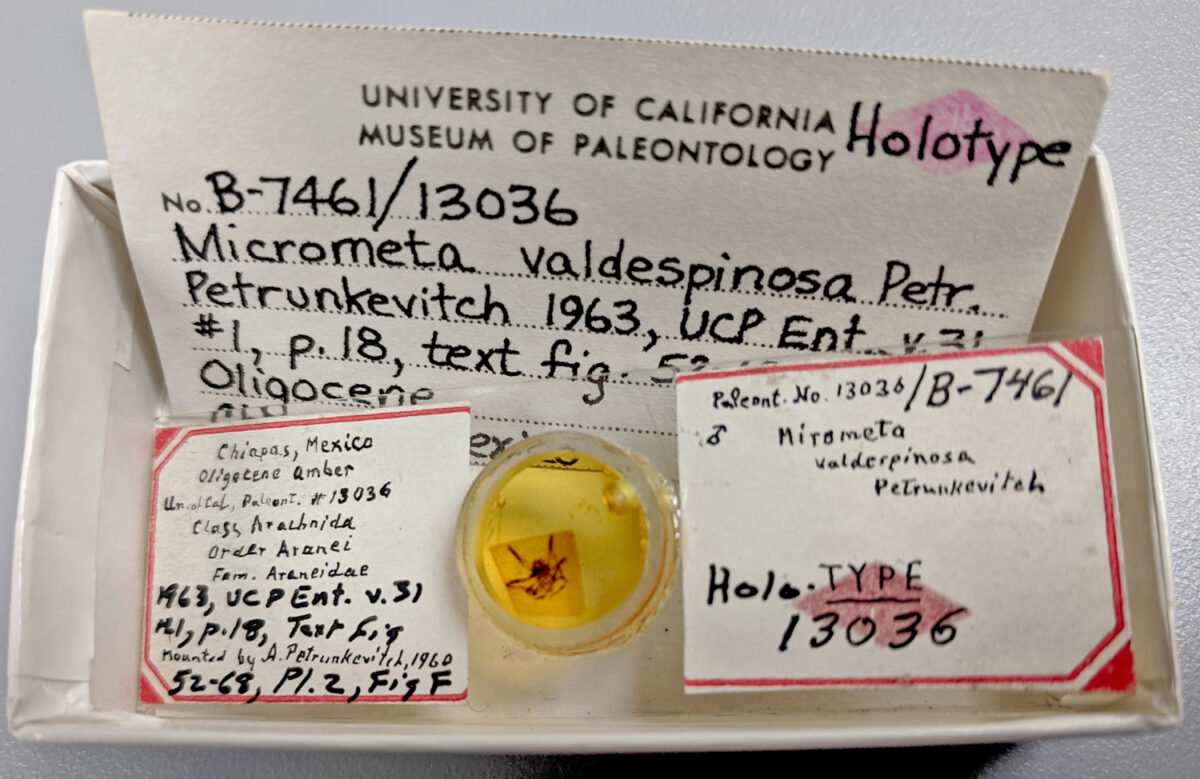
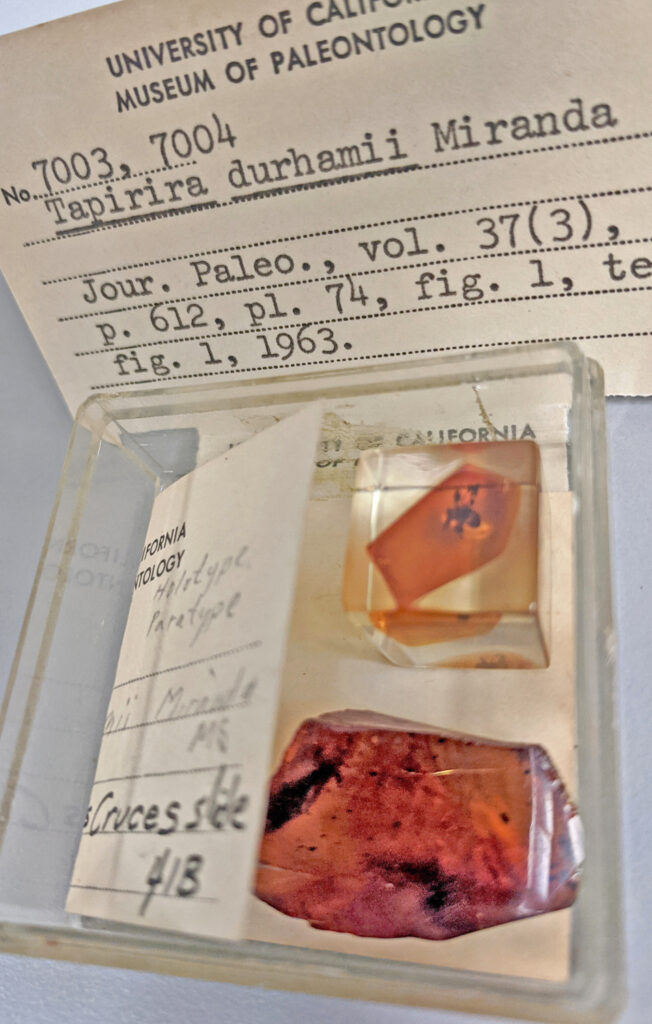
As mentioned the practice of embedding amber in casting resin is not new. In fact, the UCMP has a number of examples of specimens that were embedded over 60 years ago (below), a length of time that deems the process to be of archival quality. Based on this knowledge we considered the pros far outnumbered the cons for embedding the UCMP specimens, which had been stored for decades under substandard conditions.
Making the bases
After the specimens were cleaned, the first step of our embedding process was to pour a thin base layer of catalyzed resin into each compartment of our silicone molds. The purpose of this layer was to insure the amber piece was completely encased in the casting resin. After testing several different resins we decided to use Clear-Lite, a UV-stabilized polyester resin by Tap Plastics. Although Epo-
Tek is touted for its archival quality, low viscosity, it is very expensive at $250 per 8 ounces vs. Clear-Lite at $26 per quart. In addition to being less expensive, we found Clear-Lite to have excellent de-gassing properties, a fairly long working time, cures at room temperature, curing time was relatively short, resin was easy to measure, and the catalyst MEKP, which is a hazardous compound, was safely dispensed using the dropper bottle it came in. Because our specimens were so fractured it was very difficult to minimize bubble formation within and outside the amber when we tried embedding them under vacuum. Even under the most gentle vacuum, we had an issue with a layer of microbubbles forming on the surface between the amber and the resin. We also ran into an issue with crystallization in this same area using the Epo-Tek 301, it was inconsistent and unpredictable from batch to batch. In addition, we were concerned about specimens breaking under vacuum, a huge risk we wanted to avoid.
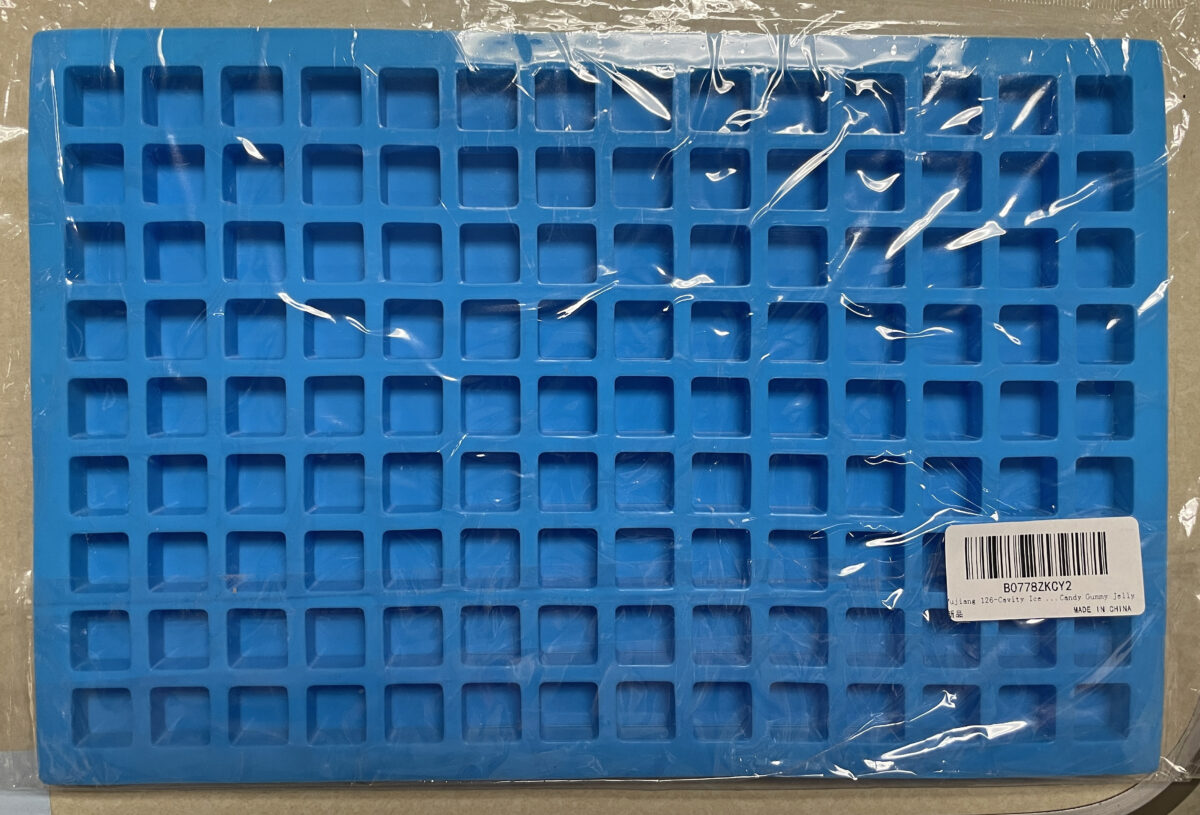
We used sheets of Mujiang 126-Cavity ice cube/candy silicone molds (cavity size = 0.6 in. x 0.6 in. x 0.4 in.; 1.5 cm x 1.5 cm x 0.9 cm) cut into linear sets of threes as this size was ideal for the small size of the majority of the UCMP Chiapas amber pieces.
View the video below to learn more about our process for making the bases
Casting in resin
Once the bases were cured, the amber pieces were placed on the base ready for embedding. As mentioned, we used Clear-Lite casting resin and all embedding work was done in a fume hood. We found working with three sets of three specimens or nine specimens at a time was the best. Using a ratio of 0.5 ounces of resin to eight drops of MEKP catalyst provided just the right amount of Clear-Lite to embed nine specimens. Prior to embedding, we dipped the specimens in catalyzed resin in a separate cup to coat the specimen, removing any dust that may not have been removed during the cleaning process. This also allowed for the infilling of surface cracks. Specimens were cured in the fume hood for at least one to two days to insure they were fully cured before trimming them using a small table-top miter saw.
View the video below for more details about our methodology and the materials used